How to Set Up Google Analytics 4 for Your Website: Step-by-Step (2026)
A practical, step-by-step GA4 setup guide for Indian websites, from creating the property to key events, payment gateway exclusions and Google Ads linking.


If you are wondering how to set up Google Analytics 4 for your website, the process takes about 30 minutes: create an Analytics account and property, add a web data stream, install the Google tag (directly, through Google Tag Manager or a plugin), then configure key events, data retention and integrations. This guide walks through each step with the settings that matter.
I have set up GA4 for Indian D2C brands, coaching institutes, clinics and local service businesses. The installation is the easy part. Most bad data comes from the ten minutes of configuration people skip afterwards, so this guide spends as much time on those settings as on the tag itself.
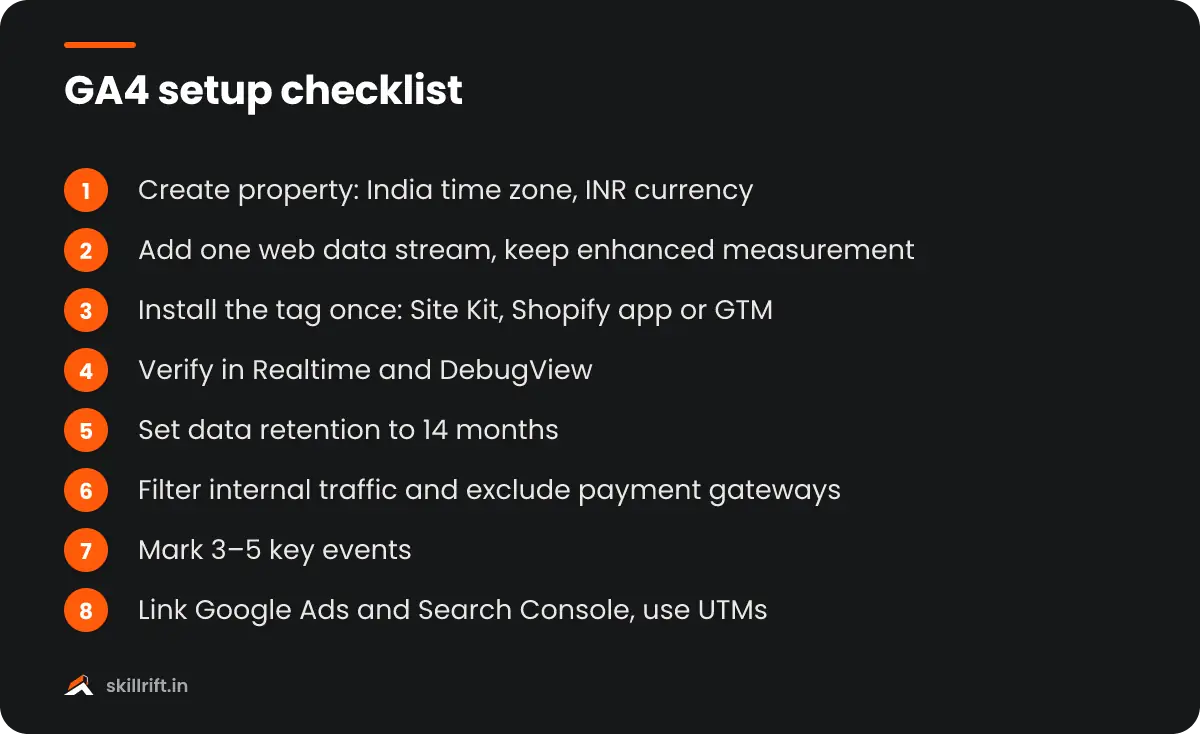
How to set up Google Analytics 4: what you need first
You need a Google account, admin access to your website, and about 30 minutes. Decide these three things before you click anything, because they are harder to change later.
- Which Google account owns the property. Use a business Google account, not an employee’s personal Gmail. If an agency or freelancer sets it up, ask them to add you as an Administrator and keep ownership with the business.
- How you will install the tag. WordPress sites can use the Site Kit by Google plugin, Shopify stores can use the Google & YouTube app, and custom sites can use Google Tag Manager or the gtag.js snippet.
- What counts as success. Write down two or three actions that matter: a purchase, a lead form, a WhatsApp click or a phone call. These become your key events.
Also check whether a GA4 property already exists. Many businesses discover an old property created by a previous developer. Using it, if you can get admin access, keeps historical data in one place.
Step 1: Create your Analytics account and property
The account is the container for your business, and the property is where your reports live. Most businesses need one account and one property per website or app.
- Go to analytics.google.com and click Start measuring. If you already have an account, open Admin and click Create, then Property.
- Enter an account name, usually your business name, and choose the data-sharing settings you are comfortable with.
- Name the property, for example “Brand name – Website”.
- Set the reporting time zone to India (GMT+05:30) and the currency to Indian Rupee (₹). Getting the time zone wrong makes daily reports drift from your sales data.
- Fill in the business details and objectives. These only decide which report collections appear by default; you can change them later.
- Accept the terms of service to create the property.
Google’s own GA4 setup help page covers the same flow if the interface changes slightly.
Step 2: Add a web data stream
A data stream is the source that sends data into your property. For a website, you create one web stream and get a measurement ID that starts with G-.
- When prompted to choose a platform, select Web.
- Enter your website URL (for example yourbrand.in) and a stream name.
- Leave Enhanced measurement switched on. It automatically tracks page views, scrolls, outbound clicks, site search, form interactions, embedded YouTube video engagement and file downloads.
- Click Create stream and copy the measurement ID.
Use one web stream per website. If your blog lives on a subdomain such as blog.yourbrand.in, it can usually share the same stream. Create separate properties only for genuinely separate businesses.
Step 3: Install the Google tag on your website
Pick the installation method that matches your platform. All three send the same data; the difference is how easily you can add tracking later.
| Method | Best for | Effort | Flexibility for custom events |
|---|---|---|---|
| Site Kit by Google (WordPress) | Blogs, small business sites | Low, 10 minutes | Limited |
| Google & YouTube app (Shopify) | Shopify D2C stores | Low, ecommerce events included | Limited |
| Google Tag Manager | Any site that needs custom tracking | Medium, one-time setup | High |
| gtag.js snippet in the site header | Simple custom-coded sites | Low, but needs code access | Medium, needs developer help |
Option A: WordPress with Site Kit
- Install and activate the Site Kit by Google plugin.
- Sign in with the Google account that owns the property and grant the requested permissions.
- Choose your existing GA4 property and web stream, and let Site Kit place the tag.
Do not also paste the tag into your theme. Two copies of the tag double-count page views, which is one of the most common problems I find in audits.
Option B: Shopify
- Install the Google & YouTube app from the Shopify App Store.
- Connect your Google account and select the GA4 property.
- Shopify then sends standard ecommerce events such as view_item, add_to_cart, begin_checkout and purchase.
Option C: Google Tag Manager
- Create a container at tagmanager.google.com and add its two code snippets to every page, as close to the top of the head and body as possible.
- Create a new tag of type Google Tag, paste your measurement ID and set the trigger to Initialization – All Pages.
- Click Preview, open your site and confirm the tag fires in Tag Assistant.
- Click Submit to publish the container version, with a clear version name such as “GA4 base tag”.
GTM takes a little longer to learn, but it pays back the first time you want to track a WhatsApp button or a pricing calculator without waiting for a developer.
Check that data is coming in
Verify the installation immediately with Realtime and DebugView, not the standard reports. Standard reports can take 24 to 48 hours to fully process.
- Open your website in another tab, ideally on your phone using mobile data so you are not filtered as internal traffic later.
- In GA4, open Reports, then Realtime. You should see at least one active user within a minute or two.
- For event-level checking, use GTM Preview mode or the Tag Assistant extension, then open Admin, then DebugView to see each event and its parameters.
- Click around: scroll a long page, click an external link and search the site. Each should appear as an event.
If nothing shows, the usual causes are a wrong measurement ID, a caching plugin serving an old version of the page, or a consent banner blocking the tag until the visitor accepts.
Step 4: Configure the settings most people skip
These admin settings take ten minutes and decide whether your data is trustworthy. Do them on the same day you install the tag.
Set data retention to 14 months
Go to Admin, then Data collection and modification, then Data retention, and change event data retention from 2 months to 14 months. Standard properties offer only these two options. According to Google’s data retention documentation, the setting affects explorations and funnel reports, not standard aggregated reports, but you will want explorations for any serious analysis.
Filter internal traffic
In the web stream, open Configure tag settings, then Define internal traffic, and add your office IP address. Then go to Admin, then Data filters, and switch the internal traffic filter from Testing to Active. A ten-person team browsing the site every day can noticeably inflate a small business’s numbers.
Exclude payment gateways from referrals
This matters for almost every Indian ecommerce or course website. When a customer pays through Razorpay, PayU, Cashfree or Paytm and returns to your thank-you page, GA4 can credit the sale to the gateway instead of the ad or search that brought them. Under Configure tag settings, open List unwanted referrals and add each gateway domain you use.
Set up cross-domain tracking if you need it
If visitors move between two of your domains, for example yourbrand.in and a separate booking site, add both under Configure your domains. Both must use the same measurement ID.
Check Google signals and consent
Google signals adds demographic and cross-device data for signed-in Google users, but it can trigger data thresholding on small sites. Turn it on only if you need demographics or remarketing audiences. If you use a consent banner, make sure it supports Google Consent Mode so tags respect visitor choices. India’s Digital Personal Data Protection Rules were notified in November 2025 with phased compliance, so it is worth discussing consent with your legal advisor now.
Step 5: Create key events and link your tools
Key events are the actions that matter to your business, and linking Google Ads and Search Console puts paid and organic data next to them. Without these, GA4 only tells you how many people visited.
Mark your key events
- Go to Admin, then Events, and find the event you want, for example purchase or generate_lead.
- Click the star or the Mark as key event toggle.
- If the event does not exist yet, create it in GTM. For a lead form, a common approach is to fire a generate_lead event when the thank-you page loads, or on a successful form submission.
For a local business in Delhi or Pune, sensible key events are form submissions, clicks on the call button (track clicks on tel: links) and clicks on the WhatsApp button. Keep the list short; three to five key events is plenty for most businesses.
Link Google Ads and Search Console
- Go to Admin, then Product links, then Google Ads links, and link your Ads account. This lets you import key events as Google Ads conversions and share audiences for remarketing.
- Under Search Console links, connect your verified Search Console property to see organic queries and landing pages inside GA4.
If you run search campaigns, our guide on how to run Google Ads explains how to use these imported conversions for bidding.
Tag your campaigns with UTMs
Every link you share in email, WhatsApp broadcasts, Instagram bios and influencer posts should carry utm_source, utm_medium and utm_campaign parameters. Without them, much of that traffic lands in Direct or Unassigned and you cannot tell which campaign worked. Agree on a naming format, such as lowercase and hyphens only, and keep it in a shared sheet.
Common mistakes when you set up GA4
Most GA4 problems come from a handful of repeat mistakes. Check this list before you trust any report.
- Two tags on the same page. A plugin and a hard-coded snippet both firing doubles page views and halves engagement rate.
- Wrong time zone or currency. Revenue in USD on an Indian store makes every report confusing.
- Too many key events. Marking scrolls and page views as key events makes conversion rates meaningless.
- No purchase deduplication. Send a transaction_id with each purchase so a refreshed thank-you page is not counted twice.
- Ignoring Unassigned traffic. A large Unassigned channel usually means missing or inconsistent UTMs.
- Judging the setup on day one. Give it at least a week of data before drawing conclusions.
For the bigger picture of what to do with this data once it starts flowing, read our beginner’s guide to marketing analytics. If you are preparing for analytics roles, the GA4 interview questions and answers guide tests the same concepts.
Conclusion and next steps
Learning how to set up Google Analytics 4 properly is mostly about the configuration after the tag goes live: the right time zone and currency, 14-month retention, internal traffic filters, gateway exclusions and a short list of key events. Do these once and your reports stay reliable for years.
Your next steps: install the tag today, verify it in Realtime, finish the Step 4 settings, and review your first week of Traffic acquisition data. If you want guided, hands-on practice with GTM, explorations and real client-style projects, the SkillRift Google Analytics 4 course covers it end to end, or you can join our free masterclass first.
Frequently asked questions
How to set up Google Analytics 4 without Google Tag Manager?
You can install GA4 without Tag Manager by using the Site Kit by Google plugin on WordPress, the Google & YouTube app on Shopify, or by pasting the gtag.js snippet from your web stream into the head of every page. GTM is only needed when you want flexible custom event tracking later.
Is GA4 free to use?
Yes. The standard version of Google Analytics 4 is free for any website or app, including features such as explorations, key events and the BigQuery export. Google Analytics 360 is the paid enterprise version, used by very large businesses that need higher limits, longer data retention and service-level agreements.
How long does GA4 take to show data?
The Realtime report and DebugView show data within a minute or two of installation. Standard reports usually take 24 to 48 hours to process fully, so numbers for the current day can change. Wait at least a week before comparing channels or drawing conclusions from a new property.
Can I move my old Universal Analytics data into GA4?
No. Universal Analytics and GA4 use different data models, so historical UA data cannot be imported into a GA4 property. Universal Analytics stopped processing data in 2023 and its interface has since been shut down. If you exported UA data earlier, keep it in sheets or BigQuery for reference.
Do I need a developer to set up GA4?
Not for most websites. WordPress and Shopify owners can install GA4 themselves in under 30 minutes using official integrations. You may need a developer for custom-coded sites, single-page applications, or advanced ecommerce tracking through a data layer, where events depend on how the website is built.