How to Set Up Google Tag Manager: A Complete Beginner’s Guide
A step-by-step GTM setup for beginners: container, installation on WordPress or a custom site, GA4, lead tracking, consent, testing and publishing.

To learn how to set up Google Tag Manager, create a free account and Web container at tagmanager.google.com, paste the two container snippets into your site (or use a plugin), add a Google tag with your GA4 measurement ID, create triggers for the actions you care about, test everything in Preview mode and then publish a named version.
Google Tag Manager, or GTM, lets you add and change tracking codes without editing your website every time. I set it up on almost every client site I handle, from Pune coaching institutes to D2C stores, because it saves developer time and keeps tracking in one place. This guide covers the exact setup I use, including lead tracking for WhatsApp and phone clicks, which most Indian businesses care about more than page views.
What Google Tag Manager does and why you need it
Google Tag Manager is a free container that loads your marketing and analytics tags, so you manage GA4, Google Ads, Meta Pixel and other codes from one dashboard instead of the website’s source code.
Without GTM, every new tracking request means asking a developer to edit the site, waiting a few days and hoping nothing breaks. With GTM, a marketer can add a conversion tag, test it and publish it in under an hour. You also get version history, so a bad change can be rolled back in a click.
Three building blocks do all the work:
| Component | What it is | Example |
|---|---|---|
| Tag | The code that sends data somewhere | Google tag for GA4, a GA4 event, Google Ads conversion |
| Trigger | The rule that decides when a tag fires | All pages, a click on a wa.me link, a form submission |
| Variable | A value GTM reads to check a trigger or pass data | Click URL, Page Path, a data layer value such as order value |
Free playbook
Get the free Analytics, GA4 and CRO Playbook
A 25-page guide covering GA4 setup, Tag Manager, UTMs, attribution, Looker Studio dashboards, heatmaps, A/B testing and landing page fixes. We email it to you, plus occasional new guides. Unsubscribe anytime.
Before you start: what you need
You need a Google account, edit access to your website or its CMS, and a GA4 property with its measurement ID (it starts with G-).
Also check whether GA4 is already installed directly on the site through a theme setting, a plugin or a hard-coded gtag.js snippet. If it is, plan to remove it once GTM is live. Running both is the most common reason I see doubled sessions in client accounts. If you have not created a GA4 property yet, follow our guide on how to set up Google Analytics 4 first.
How to set up Google Tag Manager in 8 steps
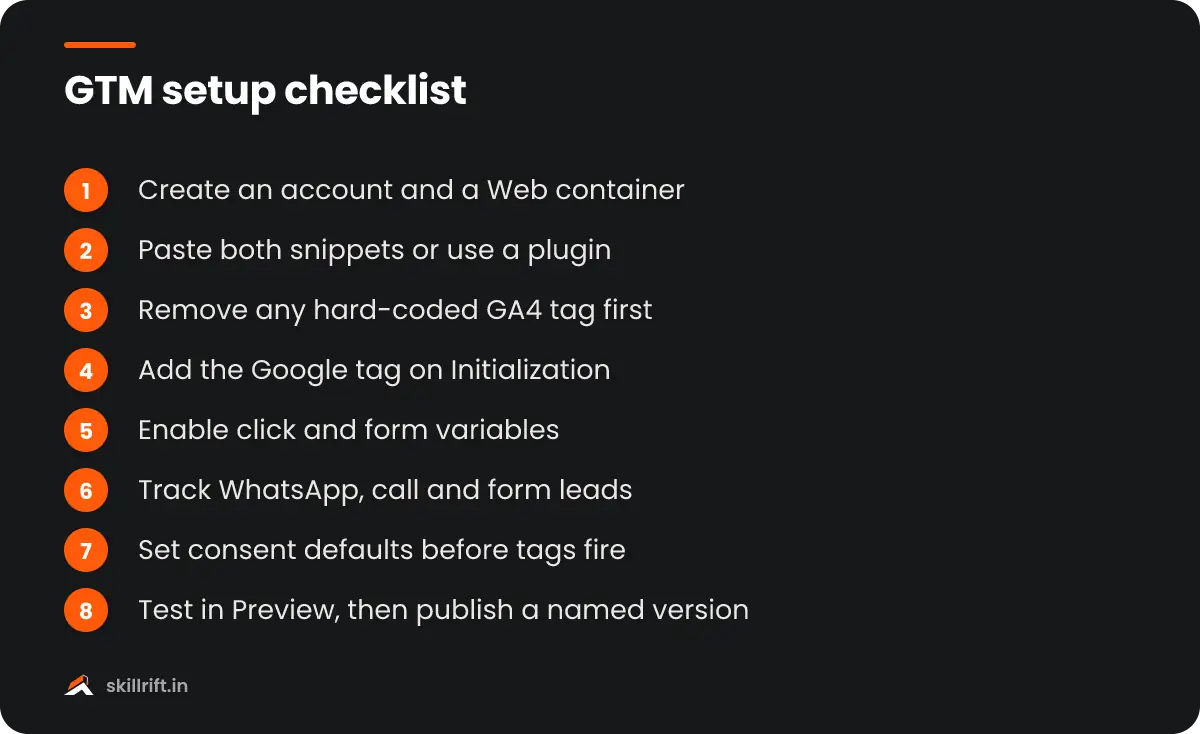
The full setup takes about two hours the first time: create the container, install it, connect GA4, track leads, handle consent, test and publish.
- Create an account and container. Go to tagmanager.google.com and click Create Account. Use the business name as the account name, choose India as the country, enter the website domain as the container name and select Web as the target platform. Accept the terms and GTM shows you the installation code.
- Install the container code. GTM gives you two snippets. Paste the first as high as possible inside the <head> of every page and the second immediately after the opening <body> tag. Your container ID looks like GTM-XXXXXXX.
- Add the Google tag for GA4. In your workspace, go to Tags, click New and choose Google Tag. Paste your G- measurement ID and set the trigger to Initialization – All Pages. Name it clearly, for example “GA4 – Google tag”.
- Enable built-in variables. Under Variables, click Configure and tick Click URL, Click Text, Click Classes, Form ID and Form Classes. Triggers for clicks and forms depend on these.
- Create lead events. Build GA4 Event tags for the actions that matter to the business. The section below shows the three I set up on nearly every Indian lead-generation site.
- Set up consent. If you use a consent banner, add its GTM template and fire it on the Consent Initialization trigger so default consent states are set before any other tag loads.
- Test in Preview mode. Click Preview, enter your website URL and use the site in the Tag Assistant window. Check that each tag fires once, on the right action.
- Submit and publish. Click Submit, give the version a name such as “v1 – GA4 base and lead events” with a short description, and publish. Then confirm data appears in GA4’s Realtime report.
Installing GTM on WordPress
On WordPress, the cleanest options are the GTM4WP plugin or Google’s Site Kit plugin, both of which add the container without editing theme files.
If you paste code into the theme directly, use a child theme, or the code disappears when the theme updates. Whichever method you choose, use only one, and remove any older GA4 or Pixel plugin that would load the same tags twice.
Installing GTM on Shopify and custom sites
On a custom site built in React, PHP or plain HTML, a developer adds both snippets to the shared layout file so they appear on every page.
Shopify is different. You can add GTM to theme.liquid for storefront pages, but GTM does not run on Shopify’s checkout. Purchase tracking there is handled through Shopify’s customer events and custom pixels, or through the Google and YouTube app. Decide which system owns purchase events before you start so you do not count orders twice.
Tracking WhatsApp, call and form leads
For most Indian small businesses, the conversions that matter are WhatsApp clicks, phone calls and enquiry forms, and GTM can track all three with simple click and form triggers.
| Lead action | Trigger type | Condition | GA4 event name |
|---|---|---|---|
| WhatsApp click | Click – Just Links | Click URL contains wa.me or api.whatsapp.com | whatsapp_click |
| Phone call click | Click – Just Links | Click URL starts with tel: | phone_click |
| Enquiry form | Form Submission or a thank-you page view | Form ID equals your form, or Page Path contains /thank-you | generate_lead |
For each row, create a GA4 Event tag, enter your measurement ID and the event name, and attach the trigger. Then mark the events as key events in GA4 so they can be imported into Google Ads.
Form tracking is where beginners get stuck. Many WordPress form plugins submit through AJAX, so the standard Form Submission trigger never fires. A thank-you page redirect is the most reliable fix. If that is not possible, ask the developer to push a dataLayer event such as form_success when the form succeeds, and trigger your tag on that custom event.
Consent mode and privacy basics
If your site shows a consent banner, its defaults must load before any Google tag, which in GTM means firing the banner template on the Consent Initialization trigger.
Google Consent Mode v2 uses signals such as ad_storage, analytics_storage, ad_user_data and ad_personalization to tell Google tags what the visitor allowed. It is required for advertisers reaching users in the European Economic Area, and India’s Digital Personal Data Protection Act is pushing more Indian brands to collect clear consent too. Google’s consent mode documentation explains the setup for each CMP option.
Use a consent platform that offers a GTM template, such as Cookiebot, CookieYes or Usercentrics. If you also turn on Google tag gateway to serve tags from your own domain, read Google’s notes on how it interacts with consent first.
Testing, publishing and naming conventions
Never publish a change you have not seen fire in Preview mode, and always give each published version a clear name so you can roll back quickly.
In Tag Assistant, click each action in the left panel and check two lists: Tags Fired and Tags Not Fired. If a tag did not fire, open it to see which trigger condition failed. Then open GA4’s DebugView to confirm the event arrived with the right parameters.
Keep names consistent from day one, for example “GA4 – Event – whatsapp_click” for tags and “Click – WhatsApp link” for triggers. On a container with 40 tags, good names are the difference between a two-minute fix and an afternoon of guessing. Google’s Tag Manager developer guide covers the installation and data layer in more depth.
Common GTM mistakes beginners make
Most broken setups come from the same handful of errors, and all of them are easy to avoid once you know them.
- Duplicate GA4: leaving a hard-coded GA4 snippet on the site after adding the Google tag in GTM.
- Forgetting to publish: changes in a workspace do nothing until you click Submit and publish.
- Triggers that are too broad: an “All Clicks” trigger on a conversion tag will count every click as a lead.
- Snippet in the wrong place: placing the head code in the footer delays tags and misses quick visitors.
- Too many admins: give clients and freelancers only the access they need, and remove ex-team members.
Once GTM is stable, the next step is adding a Google Ads conversion tag with the Conversion Linker. Our guide on how to run Google Ads shows where those conversions are used in campaigns.
Conclusion: how to set up Google Tag Manager the right way
A careful GTM setup gives you clean data for every channel you run. Install the container once, load GA4 through the Google tag, track the leads that matter, respect consent, and test every change before you publish.
Next steps: set up GTM on your own site or a friend’s business this week, add the three lead events from the table above, and check them in GA4 DebugView. If you want guided, hands-on practice with GA4 and GTM on real websites, take a look at our Google Analytics 4 and tracking course, or join the free masterclass to start.
If you run Meta ads, the next step is to set up the Meta Conversions API alongside your Pixel.
Frequently asked questions
How long does it take to learn how to set up Google Tag Manager?
A basic setup with the container, the Google tag for GA4 and two or three lead events takes most beginners two to three hours the first time. Becoming comfortable with triggers, variables and the data layer usually takes a few weeks of practice on real websites, ideally with different platforms such as WordPress and Shopify.
Is Google Tag Manager free?
Yes. The standard version of Google Tag Manager is free with no limit on tags for normal websites. There is a paid Tag Manager 360 version for large enterprises that need extra governance features and service agreements, but small businesses, agencies and freelancers in India almost always use the free version.
Do I still need the GA4 code if I use GTM?
No. When GTM is installed, you load GA4 through a Google tag inside the container instead of pasting the GA4 code on the site. Keeping both causes duplicate page views and events. Remove any hard-coded gtag.js snippet or plugin that already sends GA4 data before you publish your container.
Why is my GTM tag not firing?
The usual causes are an unpublished container, a trigger condition that does not match, a missing built-in variable or a consent setting that blocks the tag. Open Preview mode, perform the action, then click the event in the left panel and check why the tag shows under Tags Not Fired. The trigger conditions usually reveal the problem.
Can I use Google Tag Manager on Shopify?
You can add GTM to a Shopify theme for storefront pages, but it does not load on Shopify’s checkout pages. For checkout and purchase tracking, Shopify uses its customer events and custom pixels, or the Google and YouTube app for GA4 and Google Ads. Many stores combine both approaches carefully to avoid duplicates.